Launch SmartLink VCI (comes with X431 PAD V/PAD VII/PRO5) does work as a J2534 programming device with many manufacturers.
When replacing Chevy’s transmission if it is a six-speed or 8-speed or 10-speed, they have a module built into the transmission that has to be programmed.
Here we will show how to program Chevy transmission using Launch J2534 and Techline Connect.
Preparation:
1.Download Launch smartlink c software driver on cnlaunch.com or here
2. pay for the subscription to ACDelco.com. register your laptop with Techline Connect, assign your subscription to your laptop
Procedure:
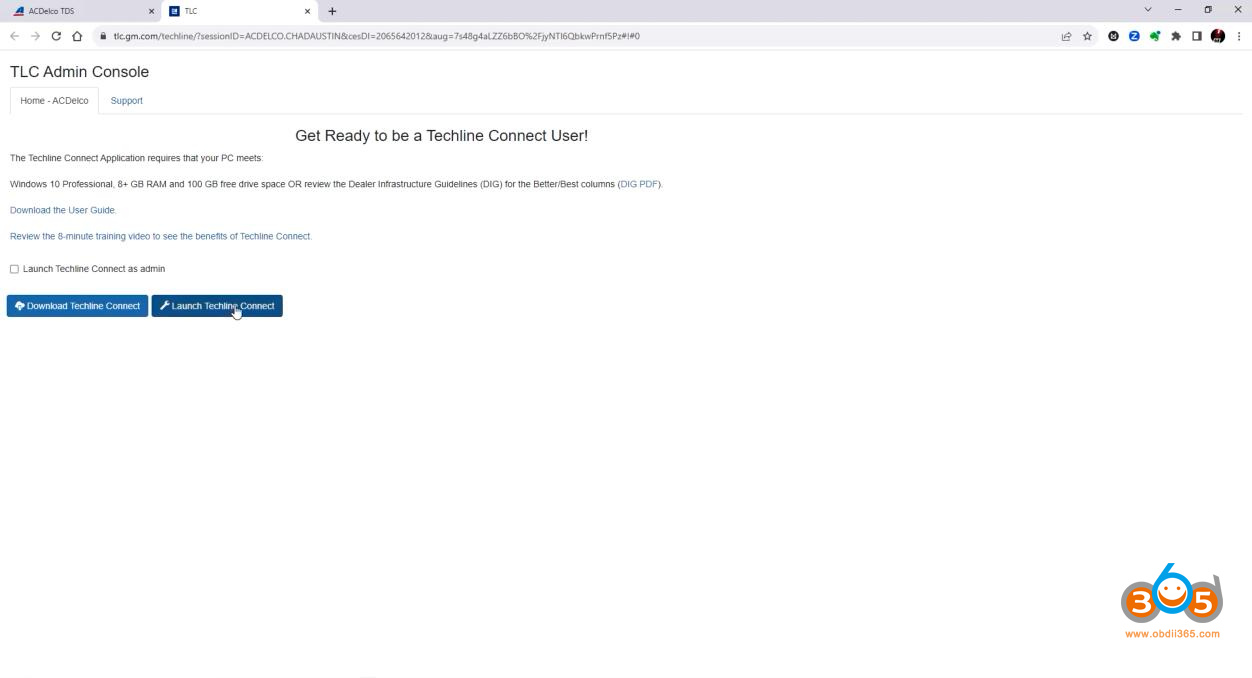
Visit ACDelco.com.
If you don’t have an account you’ll have to make an account.
Log in account, scroll all the way down, accept terms and conditions.
Here we have two available programming slots so we can program two more vehicles.


->>Check more details about Techline Connect subscription
The Launch Techline Connect.

Connect vehicle

Each time you open it it’s going to check for updates.
It doesn’t always successfully update so we’re waiting waiting waiting and we get a message for some updates.
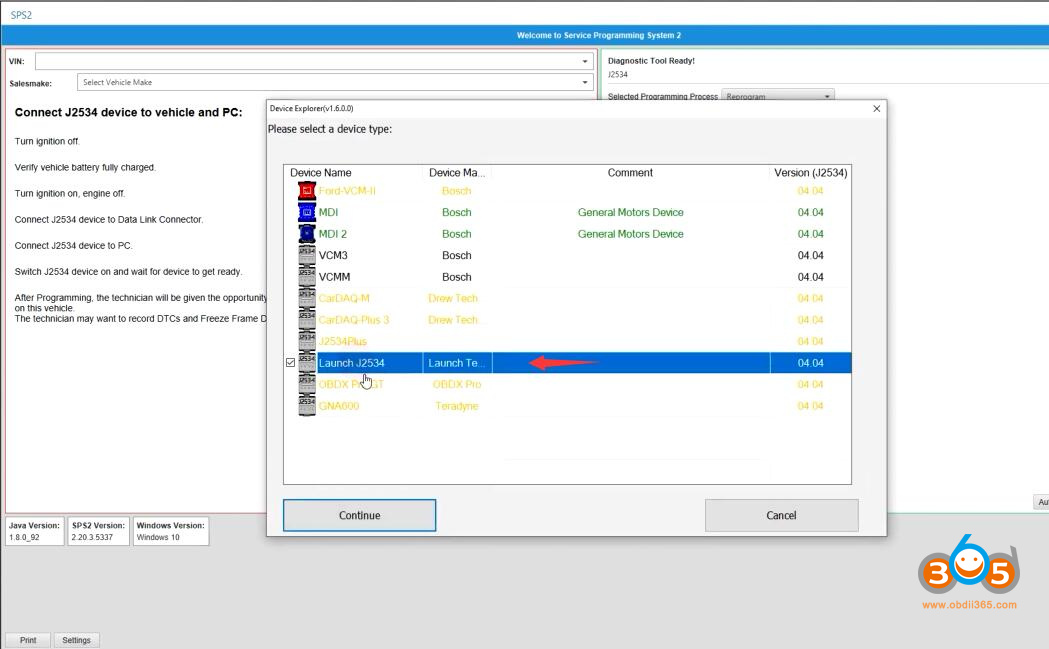
Once update finished, wee’re going to connect to the vehicle.
It should pop up a screen to pick our j2534 communication device we are going to pick the Launch J2534.

You will see it connects with Launch J2534 interface
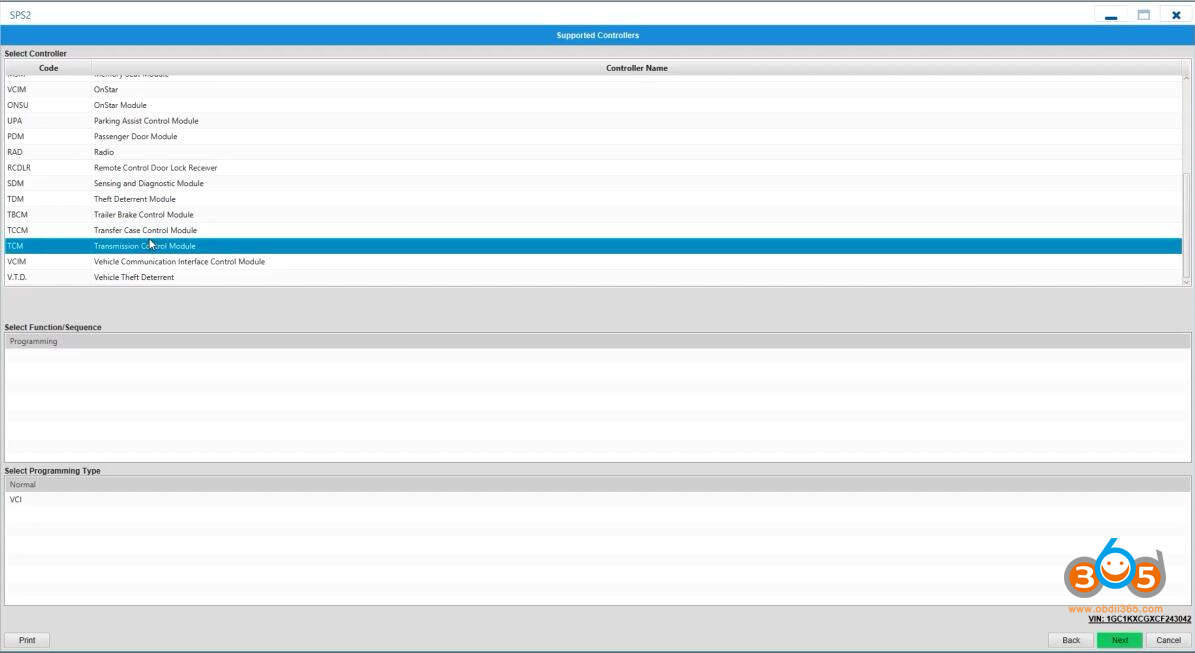
Select Replace and Reprogram


Many of these vehicles don’t allow used modules to be programmed so if you put a used transmission in you will likely fail programming it.
But some of them do go through just fine this one.
It’s a 2021 model. It is kind of hit or miss some of these vehicles will program the engine control module and the transmission control module in a sequential programming.
Select TCM module

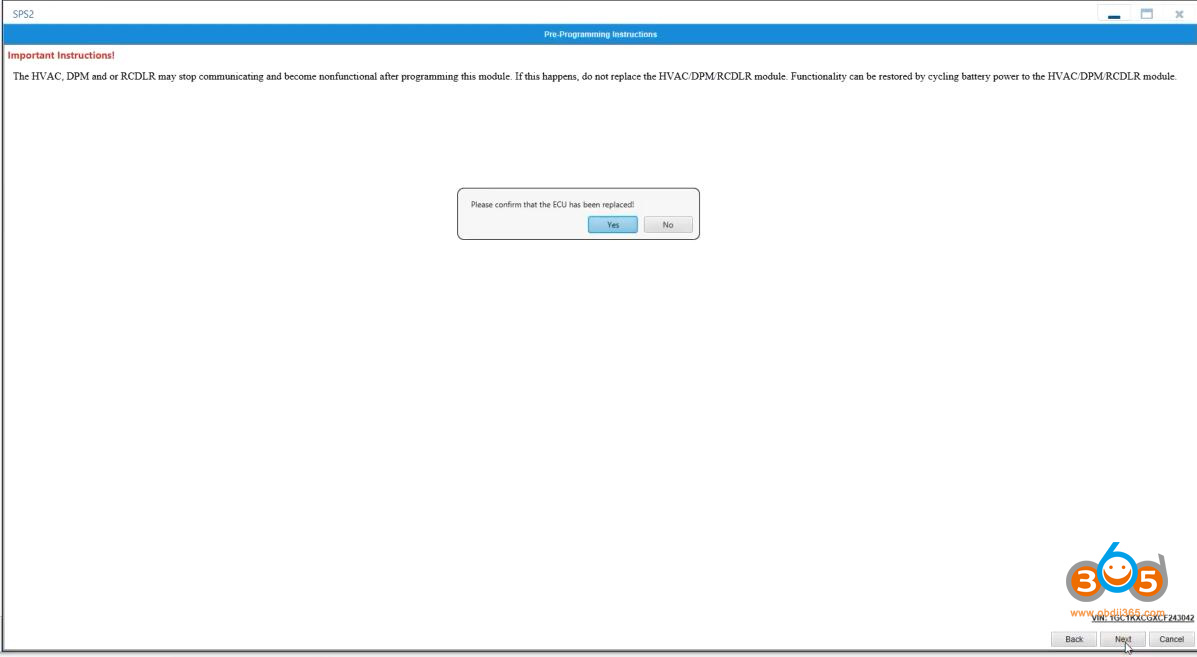
Confirm the ECU has been replaced.

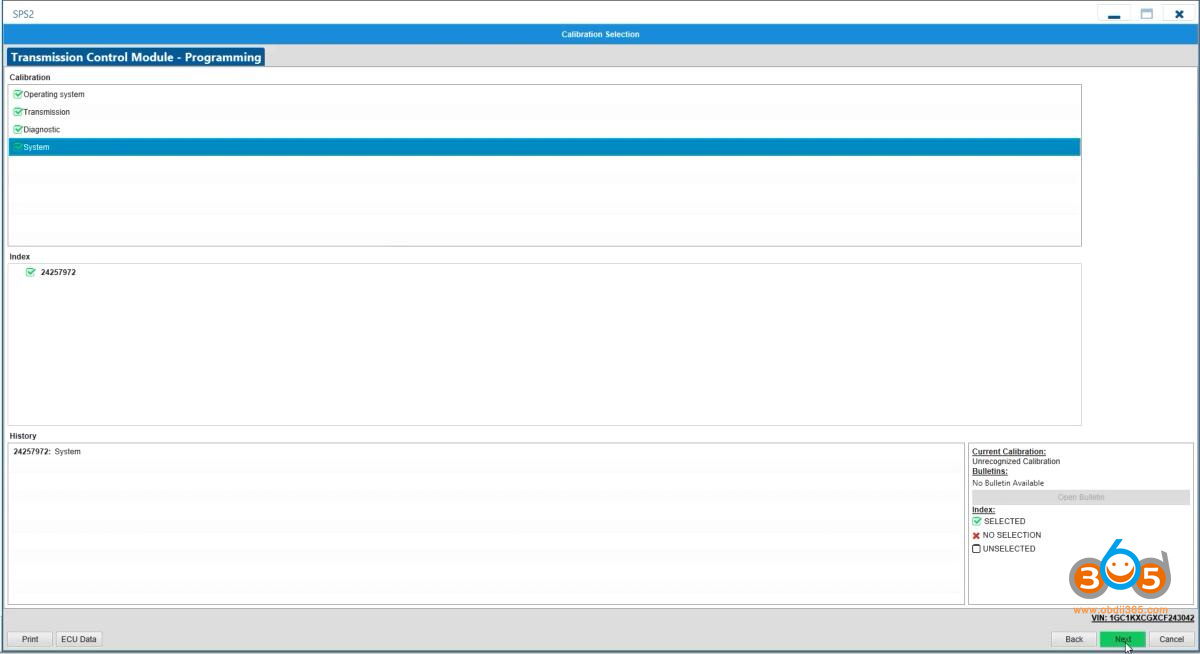
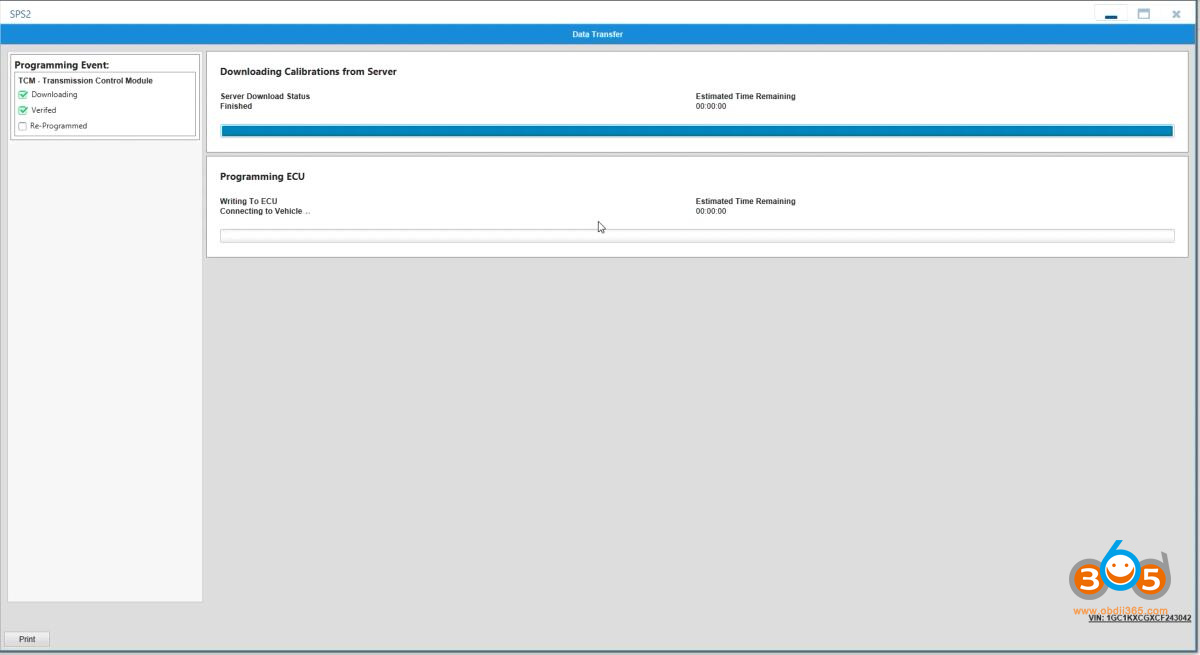
Downloading calibration from server

It’ll drop down fairly rapidly most of these vehicles take 3 to 7 minutes to program the transmission.
Program ECU until completed.

Then it should pop up with a calibration confirmation screen even though it’s at 100% it’s probably doing a little bit of file cleanup.
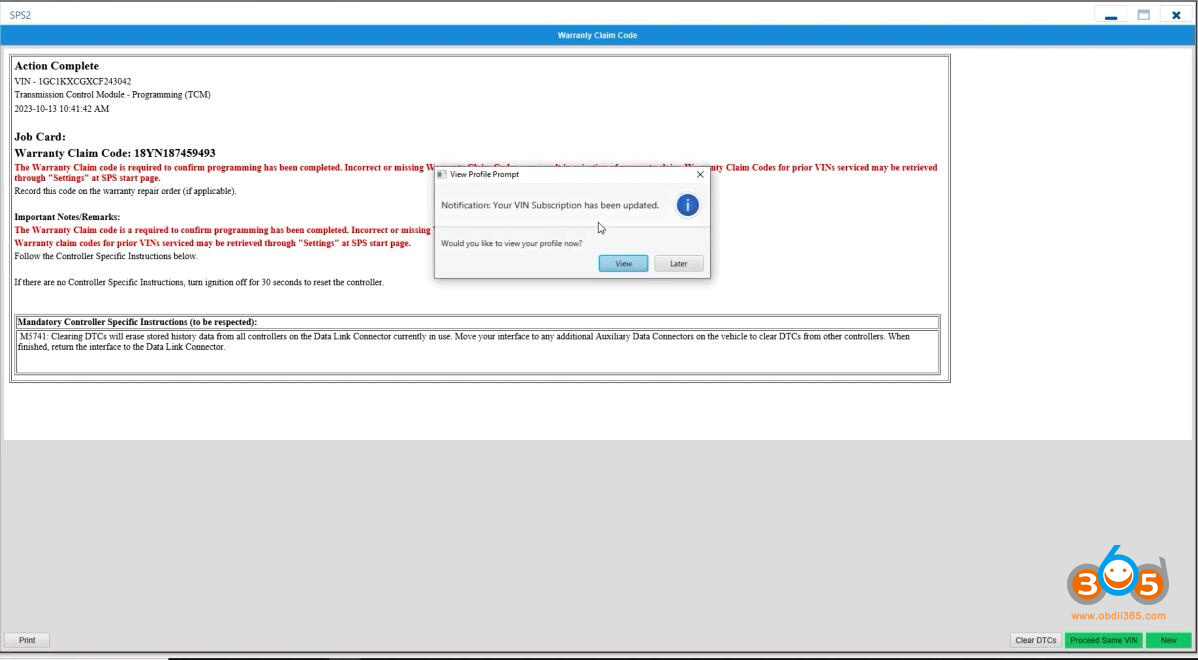
So here we go we have the VIN number TCM programming it shows that it was complete.

Clear fault code and test new TCU.
Read also:
Comments
Post a Comment