
When to Connect Launch X431 Pro5 via USB?

When do you need to connect Launch X431 Pro5 via USB?


Case 1:

When you need to establish an ECU/TCU cloning with X431 Pro5+ X-prog3, the system will ask you to connect the USB to scanner.

connect launch x431 pro5 via usb 1

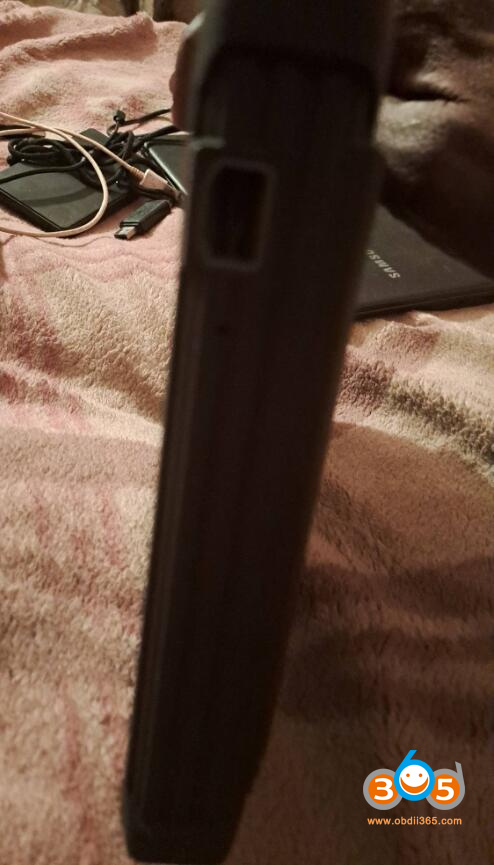
There is a port on the side of pro5. The port is used to charge the battery. You can also connect it with USB through an OTG adapter.

connect launch x431 pro5 via usb 2

connect launch x431 pro5 via usb 3

Case 2:

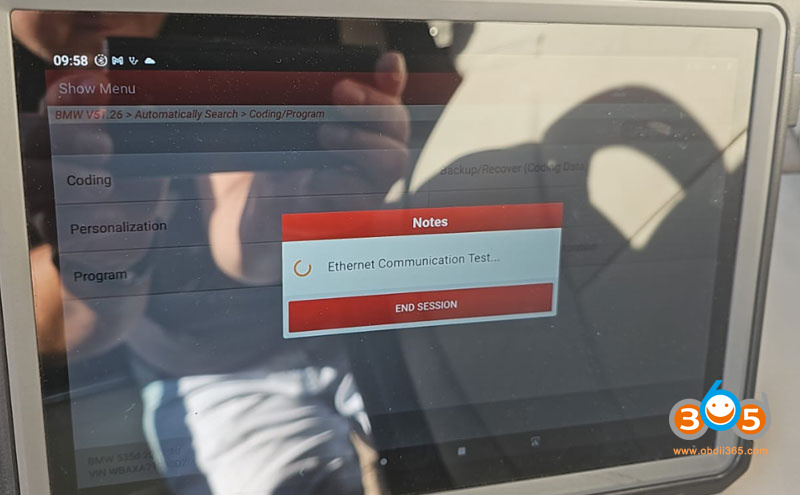
X431 Pro5 has built-in BMW and Benz online programming. Some users reported that E series onling coding/programming goes fine, but failed to program F series online, i.e

failed to program F series BMW 525d 2014 and BMW 535d, F series 2013 (error Ethernet Communication Test Failed).

connect launch x431 pro5 via usb 4

connect launch x431 pro5 via usb 5

To program BMW F series you’d better connect ENET cable via USB instead of wireless mode.

Using otg cable for good connection. It’s going to work.

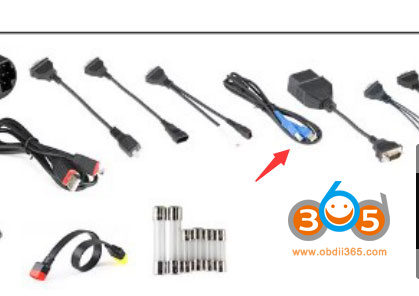
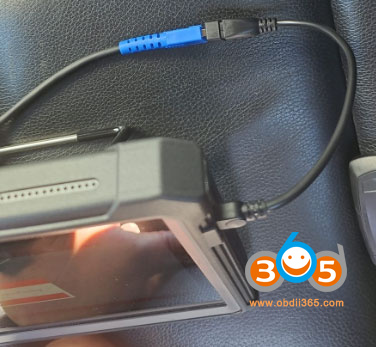
There is an Ethernet cable in the package.

connect launch x431 pro5 via usb 6

connect launch x431 pro5 via usb 7

The ENET cable cannot be connected to the port directly

connect launch x431 pro5 via usb 8

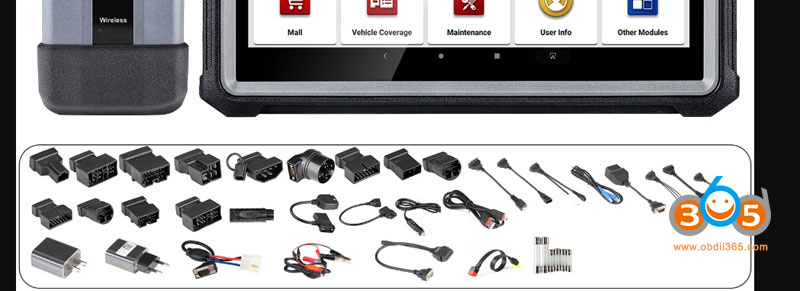
You will need a OTG converter like this:

connect launch x431 pro5 via usb 9


Case 3:

When need to transfer data from Lauch X431 Pro 5 tablet to PC, you can connect via USB cable. This also requires an OTG adapter.

NOTE: Don’t use power cable. It only charges battery. Use USB cable if need to transfer data.


https://www.obdii365.com/service/how-to-connect-launch-x431-pro5-via-usb.html

Comments

Popular posts from this blog

Install Launch X431 SmartLink C J2534 Driver

Launch X431 SmartLink C can be used as a J2534 PassThru device, working together with the PC installed with the OEM diagnostic software to perform the J2534 reprogramming.   Obdii365   shows where to download and how to install the Passthru SAE J2534 driver for LAUNCH X431 Smart Link C passthru adapter (for   PAD VII ) If you have Smartbox 3.0 (old PAD V and   X431 Pro5 ), download J2534 passthru   in the previous post .     How to Download Launch X431 SmartLink C J2534 passthru driver?   Same as smartbox 3.0, you need both installation programs (setup driver and PC tool for update).   1. Download PC tool for update (update smartlink c firmware) Visit   https://en.cnlaunch.com/ Select Products tab->X-431 PAD VII Pull down product information and find   Download Download   Smartlink J2534.zip Install Launch J2534 PC tool Run LAUNCH J2534 program on desktop. Now you can check Smartlink adapter version and update firmware 2. Download setup driver (J2534 passthru driver) Free download S

Will Lauch X-PROG3 Work with Diagzone, Xdiag or Prodiag?

Does Launch X431 X-prog3 work with xdiag, diagzone or prodiag activations?  Diagzone compatible xprog3? Is it working with prodiag? Will it work with xdiag? These are frequently asked questions of   Launch X-PROG3   (also called GIII) programmers. X-prog3 is compatible with Multiple X-431 Series   X-431 V ,  X-431 V+ ,   X431 Pro5 ,  X431 ProS ,   X431 Pro3s+ ,  X-431 PAD V ,  X-431 PAD VII , X-DIAG Pro3 diagnostic tablets. This programmer works not only for programming keys, but for working with ECU and gearbox. But when comes to key programming you need to know what you doing there is not too much info in the Diagzone/Prodiag software.   What worked and failed? Here are user reviews. *You are at your risk. We don’t provide technical support to 3rd party software.   Prodiag: Yes It works with prodiag. Prodiag provides usb connection with virtual comport. It works fine to read ECU and gearbox clone. For example, VAG DQ200 gearbox clone. Diagzone: Yes Diagzone does not provide usb conne

How to Make Porsche Coding Changes with Launch CRP919X CRP919E

 Instructions on Make Porsche Coding Changes using a Launch CRP919X , CRP919E , CRP919X BT , CRP919E BT scanners. Plugin X431 into OBD 2 Port, Turn Key to Accessory Mode and Wait until VIN is Determined then Hit the Back Arrow in the Upper Left Until You Get to the Next Screen Shown Below  Then select Diagnose (Although you may want to update the unit if updates are available) Then Scroll Down and select Porsche Then Select OK Then Select Automatically Search The Unit should determine the type of 718 you have and then Select OK Then Select System Selection Then Select the appropriate System for the Code you want to adjust (Note: This is the system listed in the instructions below such as Front-end Electronics, Rear-End Electronics, Instrument Cluster or Air Conditioning) Then select Code/Brush Hiding Then select Brush Hidden/Modified Then find the Code you want to adjust (These are the Codes in the instructions below) Then Make the Change Then Hit the Write Code Button