As titled, here's an interesting DIY tutorial on extending more car brands to Launch CRP429C diagnostic scanner by modifying the firmware.
Disclaimer: The guide was made by Alonewolf from mhhauto forum. Post here just for sharing purpose.
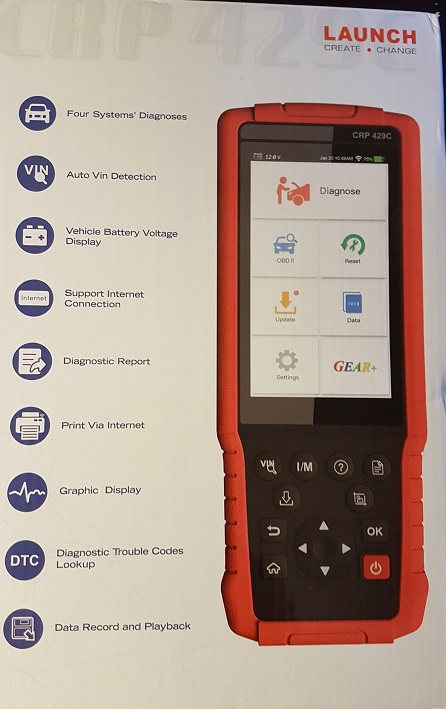
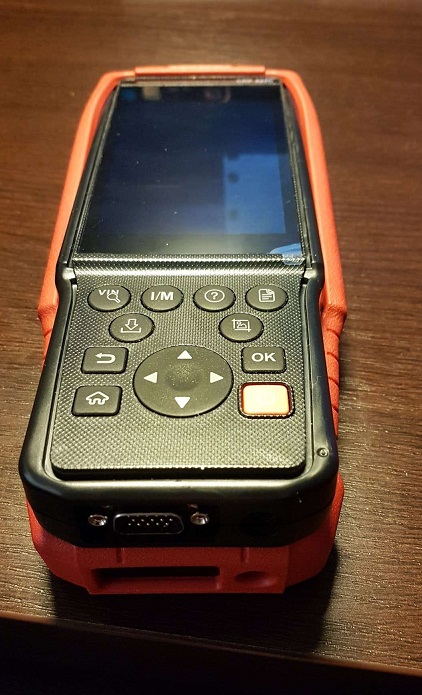
Take an example of CRP 429C scanner.
There are the following scanners from this series:
'CRP 828'
'CRP 818'
'CRP 808'
'AIDIAGSYS'
'CRP 479'
'CRP 469'
'CRP 423'
'Pilot Scan'
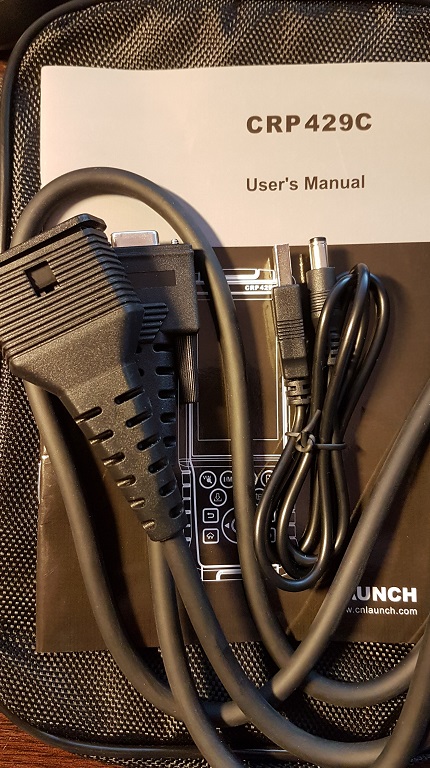
The kit includes: a scanner, a small bag, a cable with OBD2-connector and instructions.
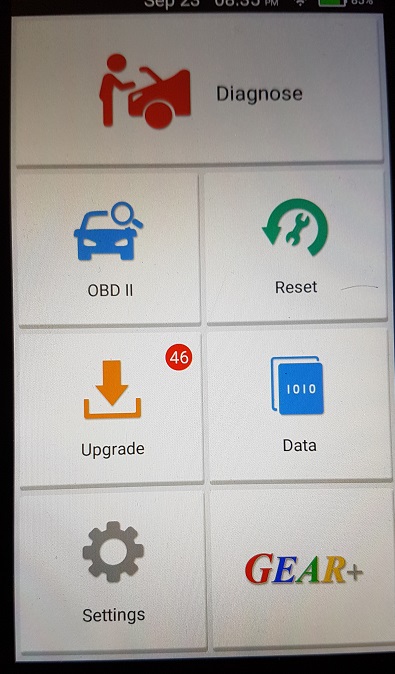
Let's see the scanner menu.
Main menu:
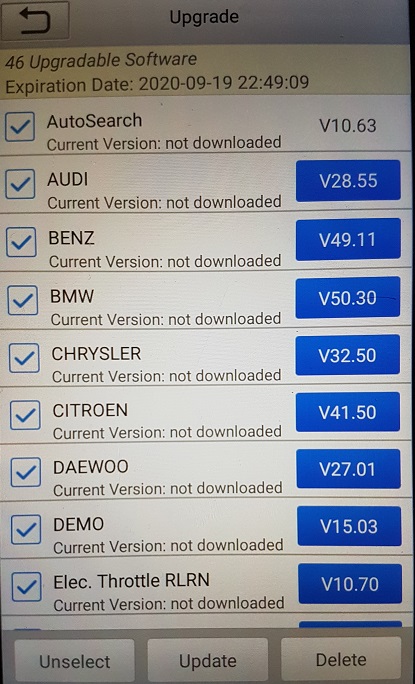
Brand Downloads:
Settings:

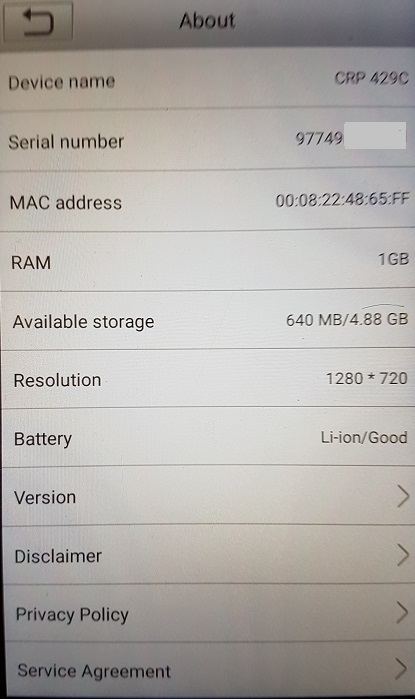
About:
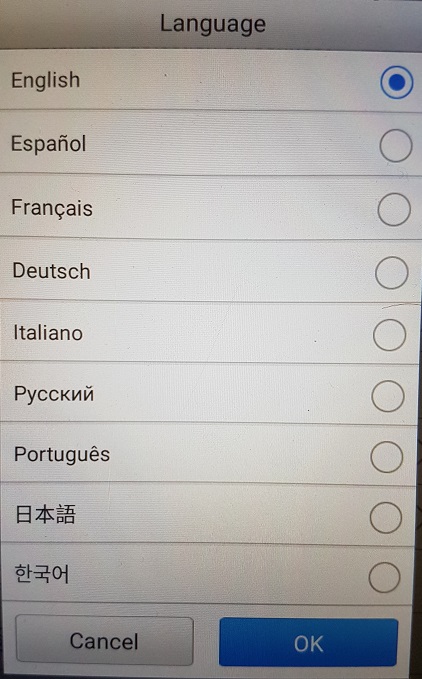
Language:
Downloaded brands and RESETs:
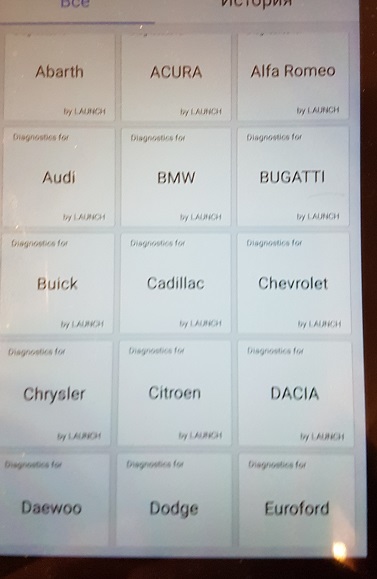
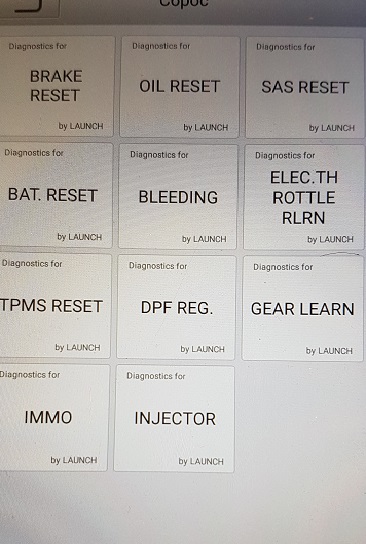
The scanner has not many brands and several RESETs.
Next I will tell you how to open the CRP429C scanner. This is necessary to make some changes to the scan tool.
We take out the scanner from the rubber (red) cover and unscrew the 7 screws on the back of the scanner:
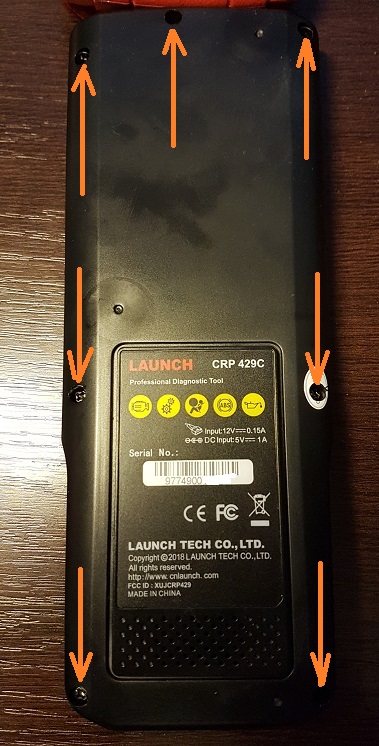
Carefully remove the cover:
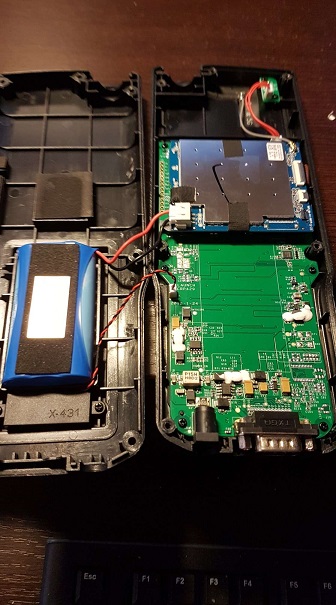
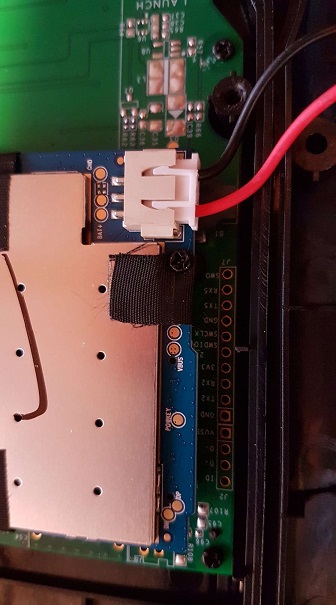
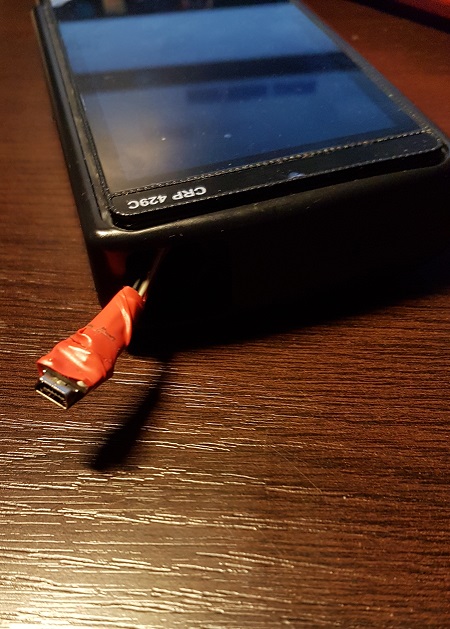
Now we need to access the scanner itself, and more specifically the android. The following photo shows where you can connect the USB connector.
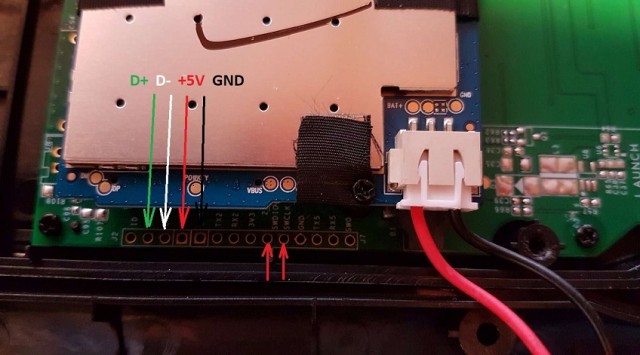
The picture shows where to solder the wires for USB. And also two arrows show where you can connect the STLINK. But this is not yet useful to us.
There are many ways to connect: standard USB, miniUSB, microUSB. I used miniUSB.
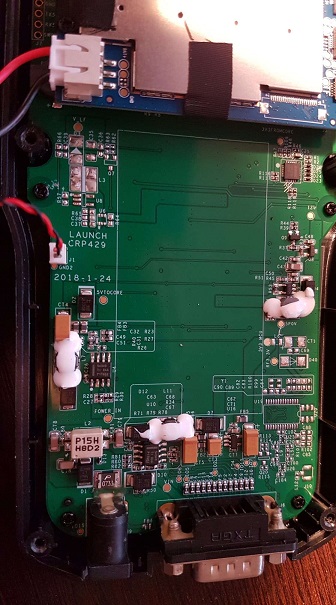
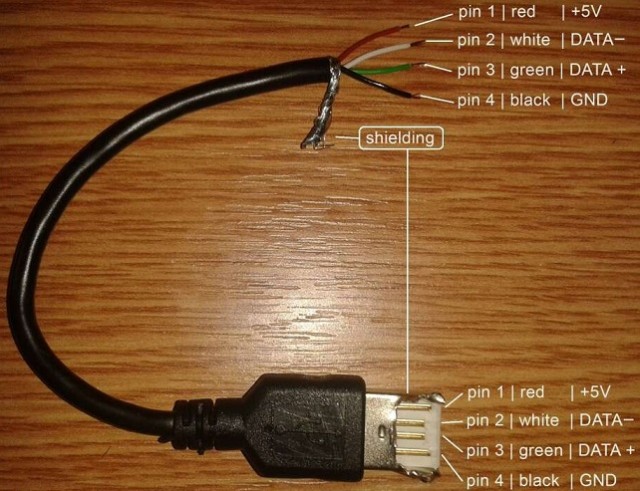
This is the miniUSB connector connection diagram:

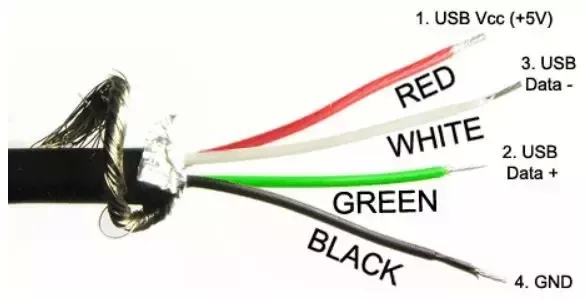
And received:
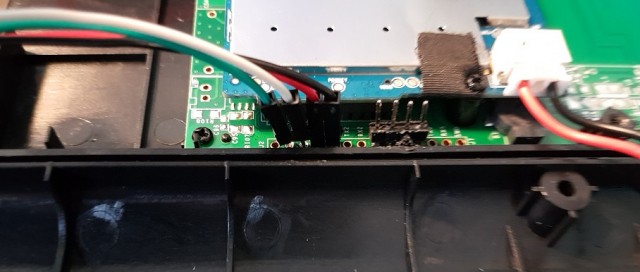
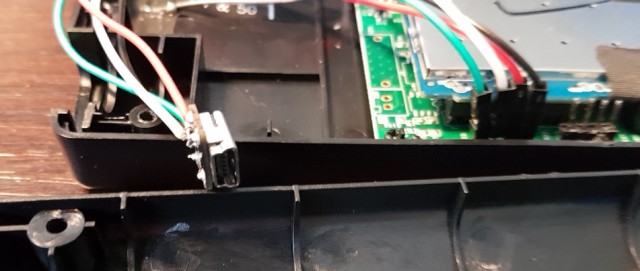
Then I carefully soldered everything and temporarily brought the connector out through the hole in the upper part of the scanner (I still did not understand why the scanner had it). In the future, I will nicely attach the USB connector to the scanner body somewhere on the side.
You can use this option (I refused it because I do not want to carry an extra cable with me):
Now that the scanner is ready for hacking, turn on the scanner and connect the scanner to the computer through our connector.
In order for the computer to see our scanner, you need to install the driver: adbdriver (link to the driver in a text file).
We start.
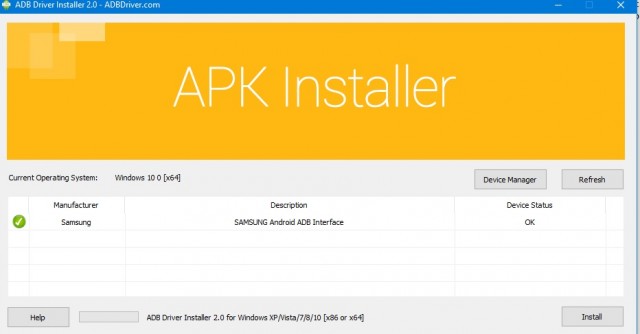
We go into "My Computer" and see if we have a new device? Has appeared.
Now we need to see what is on this device.
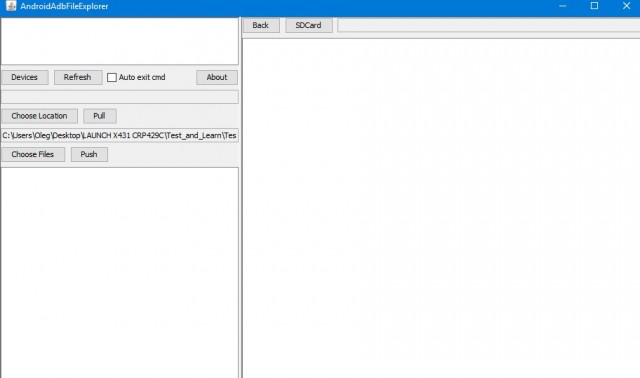
We launch the AndroidAdbFileExplorer.jar program (if someone does not have JAVA installed on the computer, then you need to install it).
Link to the driver in a text file.
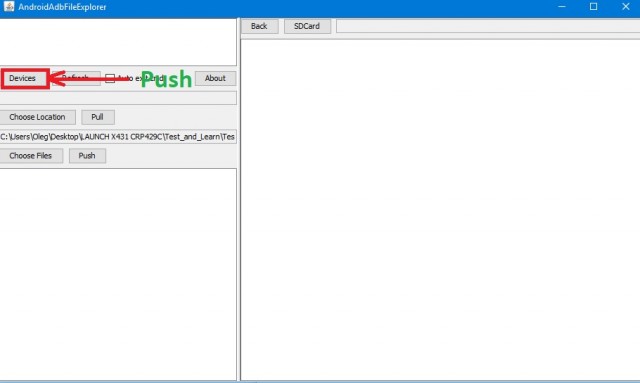
Click "Devices"
And we entered the android device.
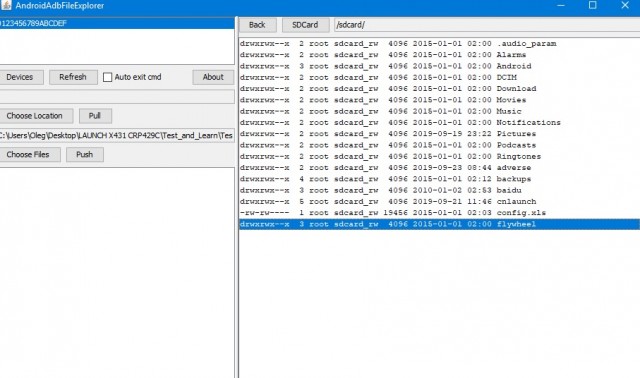
We find the desired folder and click on it 2 times and again until we get to the brands.
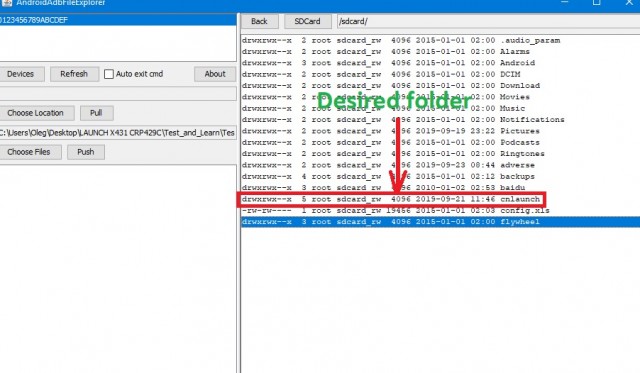
In this folder we can download or add the necessary brands.
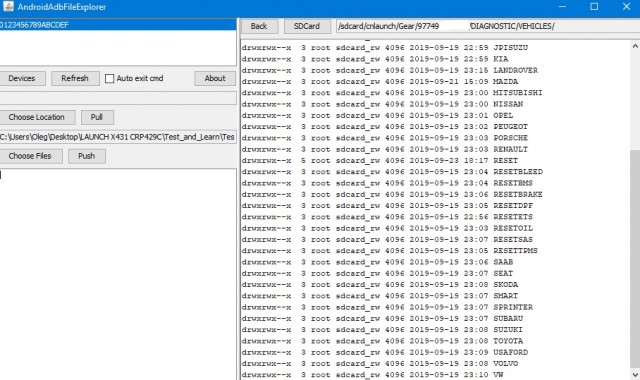
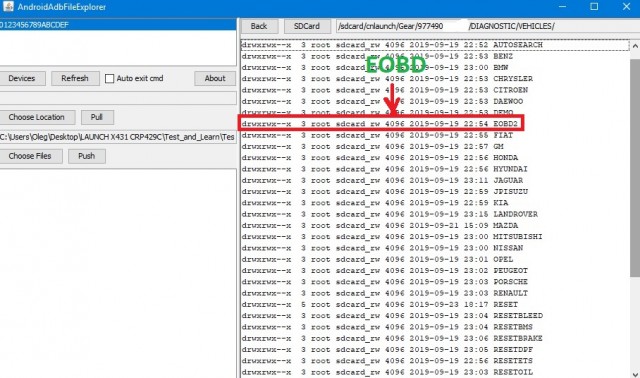
As we see, there is EOBD necessary for us. It turns out we can activate the missing brands for us.
There is not much space on this device, only 4 gigabytes, so for now you can download only the brands we need, as well as delete unnecessary.
adbdriver.txt
AndroidAdbFileExplorer.txt
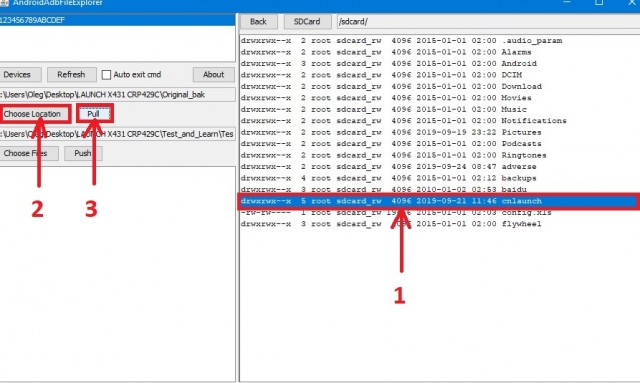
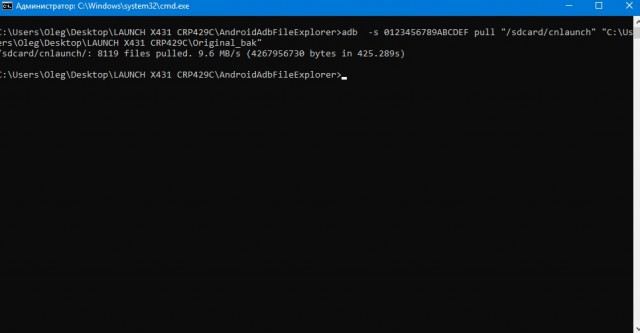
Before making any changes to the "cnlaunch" folder, we will backup this folder.
Select the folder 'cnlaunch' in the right column of the program, then click on "Choose Location", indicate the place where we want
save and click "Pull".
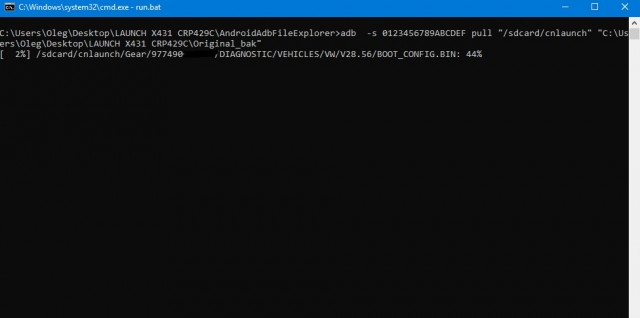
The folder will be saved on your computer:
When everything is copied will be this:
You can also save on your computer any brand from the "VEHICLES" folder.
Next, consider how you can save the brand on your device.
We go into the "VEHICLES" folder and click on "Choose File", indicate the location where the brand is located and click on "Push".
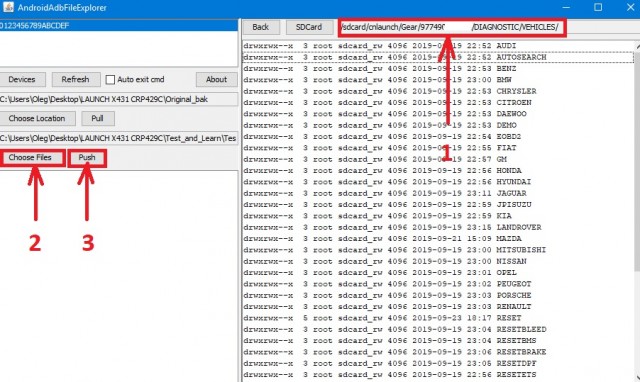
The brand will be copied to the device.

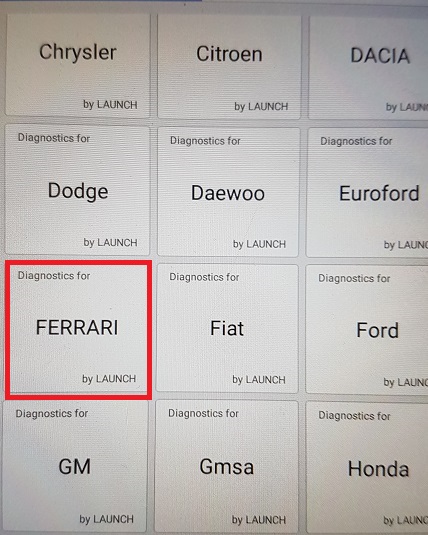
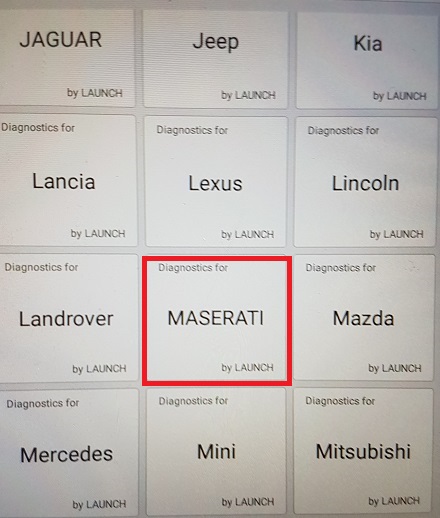
I chose two brands FERRARI and MASERATI - these brands are not on the device. Just do not forget about the correct location of the brands.
These 2 brands are in the "EUROPE" folder, so I copy this folder in which the brands are located.
For brands to appear on the device, you need to clean the cache on the device itself.
I go to the "Settings" and select "Clear". Now I go to the "Diagnostics" and find these 2 brands.
Next, I’ll tell you how to remove unnecessary brands from Creader CRP429C. This is a little harder to do.
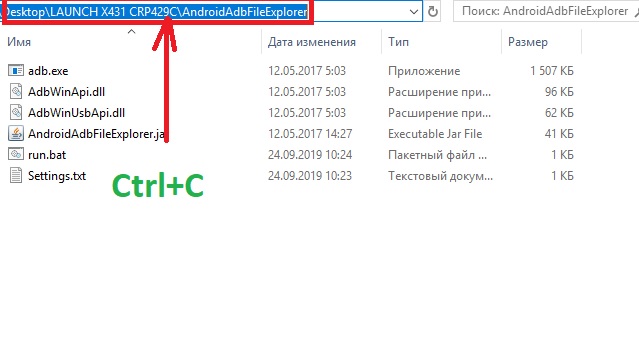
Go to the folder where we have the AndroidAdbFileExplorer program and copy the path (Ctrl + C):
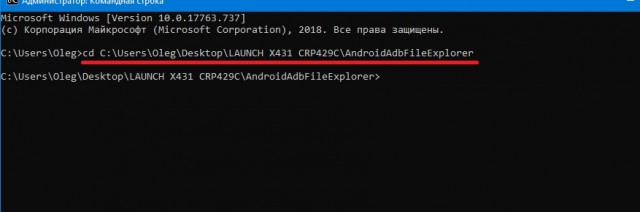
Run the command line from the menu or write "cmd".
We write cd and paste the path to the program "AndroidAdbFileExplorer" (Ctrl+V) and ENTER:
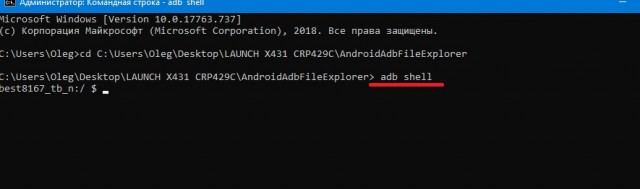
We give the command: adb shell -> ENTER
Run the program "AndroidAdbFileExplorer" and go to the folder that we want to delete.
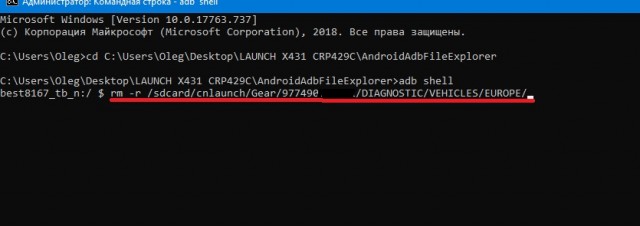
I will show you with the folder "EUROPA". So I will remove two brands: FERRARI and MASERATI.
I go into the "EUROPE" folder and copy the address (Ctrl+C):

I am writing rm -r on the command line and Paste the copied address into the command line (Ctrl+V) -> ENTER:
Folder deleted.

To make brands disappear from the device, you need to clean the cache in the settings.
There are no more FERRARI and MASERATI brands on the device.
That is all we need to know for now.
Disclaimer: The guide was made by Alonewolf from mhhauto forum. Post here just for sharing purpose.
Take an example of CRP 429C scanner.
There are the following scanners from this series:
'CRP 828'
'CRP 818'
'CRP 808'
'AIDIAGSYS'
'CRP 479'
'CRP 469'
'CRP 423'
'Pilot Scan'
The kit includes: a scanner, a small bag, a cable with OBD2-connector and instructions.
Let's see the scanner menu.
Main menu:
Brand Downloads:
Settings:
About:
Language:
Downloaded brands and RESETs:
The scanner has not many brands and several RESETs.
Next I will tell you how to open the CRP429C scanner. This is necessary to make some changes to the scan tool.
We take out the scanner from the rubber (red) cover and unscrew the 7 screws on the back of the scanner:
Carefully remove the cover:
Now we need to access the scanner itself, and more specifically the android. The following photo shows where you can connect the USB connector.

The picture shows where to solder the wires for USB. And also two arrows show where you can connect the STLINK. But this is not yet useful to us.
There are many ways to connect: standard USB, miniUSB, microUSB. I used miniUSB.
This is the miniUSB connector connection diagram:
And received:


Then I carefully soldered everything and temporarily brought the connector out through the hole in the upper part of the scanner (I still did not understand why the scanner had it). In the future, I will nicely attach the USB connector to the scanner body somewhere on the side.
You can use this option (I refused it because I do not want to carry an extra cable with me):

Now that the scanner is ready for hacking, turn on the scanner and connect the scanner to the computer through our connector.
In order for the computer to see our scanner, you need to install the driver: adbdriver (link to the driver in a text file).
We start.

We go into "My Computer" and see if we have a new device? Has appeared.
Now we need to see what is on this device.
We launch the AndroidAdbFileExplorer.jar program (if someone does not have JAVA installed on the computer, then you need to install it).
Link to the driver in a text file.

Click "Devices"

And we entered the android device.

We find the desired folder and click on it 2 times and again until we get to the brands.

In this folder we can download or add the necessary brands.

As we see, there is EOBD necessary for us. It turns out we can activate the missing brands for us.

There is not much space on this device, only 4 gigabytes, so for now you can download only the brands we need, as well as delete unnecessary.
adbdriver.txt
AndroidAdbFileExplorer.txt
Before making any changes to the "cnlaunch" folder, we will backup this folder.
Select the folder 'cnlaunch' in the right column of the program, then click on "Choose Location", indicate the place where we want
save and click "Pull".

The folder will be saved on your computer:

When everything is copied will be this:

You can also save on your computer any brand from the "VEHICLES" folder.
Next, consider how you can save the brand on your device.
We go into the "VEHICLES" folder and click on "Choose File", indicate the location where the brand is located and click on "Push".

The brand will be copied to the device.

I chose two brands FERRARI and MASERATI - these brands are not on the device. Just do not forget about the correct location of the brands.
These 2 brands are in the "EUROPE" folder, so I copy this folder in which the brands are located.
For brands to appear on the device, you need to clean the cache on the device itself.
I go to the "Settings" and select "Clear". Now I go to the "Diagnostics" and find these 2 brands.
Next, I’ll tell you how to remove unnecessary brands from Creader CRP429C. This is a little harder to do.
Go to the folder where we have the AndroidAdbFileExplorer program and copy the path (Ctrl + C):

Run the command line from the menu or write "cmd".
We write cd and paste the path to the program "AndroidAdbFileExplorer" (Ctrl+V) and ENTER:

We give the command: adb shell -> ENTER

Run the program "AndroidAdbFileExplorer" and go to the folder that we want to delete.
I will show you with the folder "EUROPA". So I will remove two brands: FERRARI and MASERATI.
I go into the "EUROPE" folder and copy the address (Ctrl+C):

I am writing rm -r on the command line and Paste the copied address into the command line (Ctrl+V) -> ENTER:

Folder deleted.

To make brands disappear from the device, you need to clean the cache in the settings.
There are no more FERRARI and MASERATI brands on the device.
That is all we need to know for now.
Comments
Post a Comment