
How to Use Launch X431 with Pogo Cable?

Question:

Can Launch X431 IMMO Plus/IMMO Elite do VW Instrument immo key with pogo pin without reading from chip? Like say 2013 VW Jetta flip key. Autel can do it via Pogo pin and plug method and this can save some time.


Here is the clue.

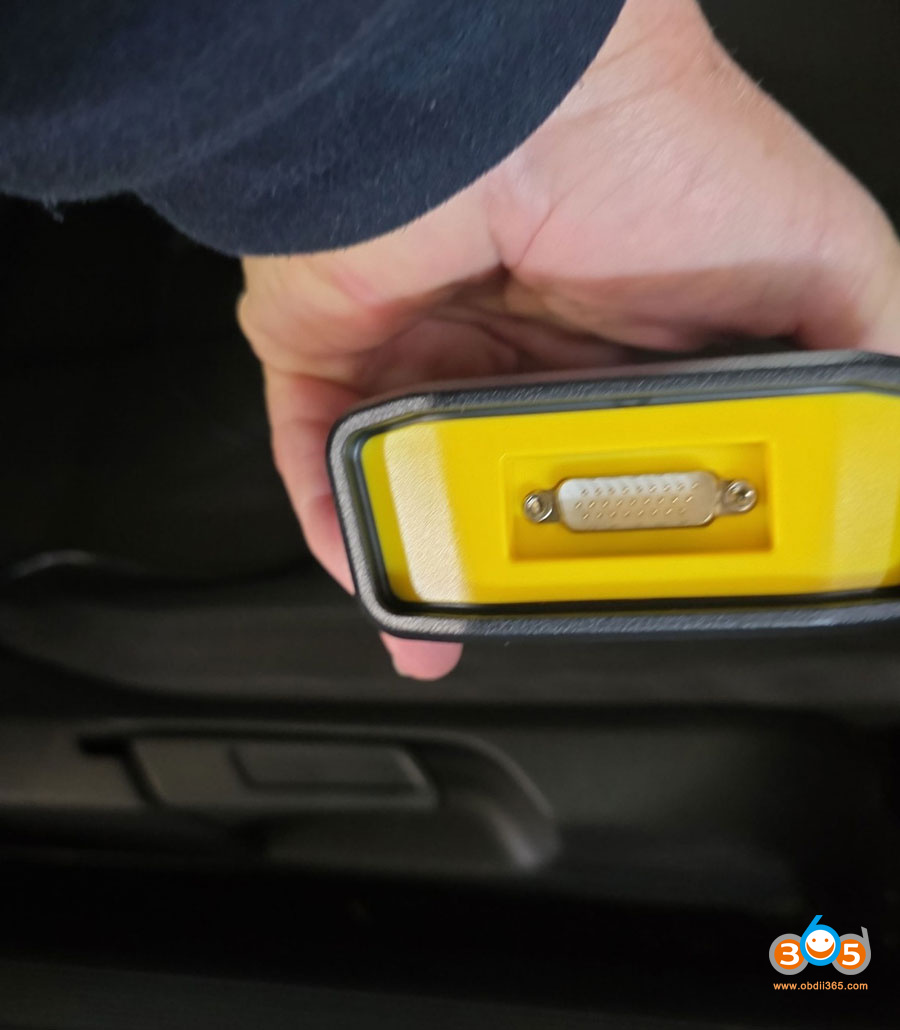
This comes with a pogo pin. There is a pogo cable in the box when you get it.

How to Use Launch X431 with Pogo Cable 1

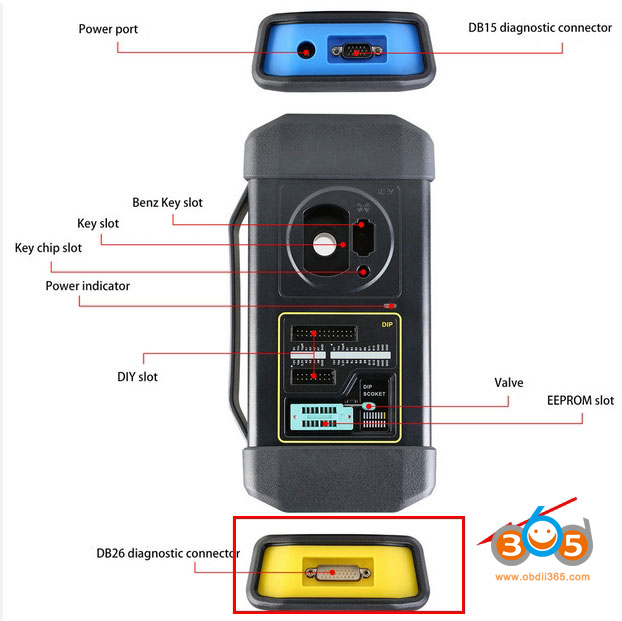
This pogo cable connects to the xprog 3 yellow port (the DB26 connector).

How to Use Launch X431 with Pogo Cable 2

How to Use Launch X431 with Pogo Cable 3

User feedback:

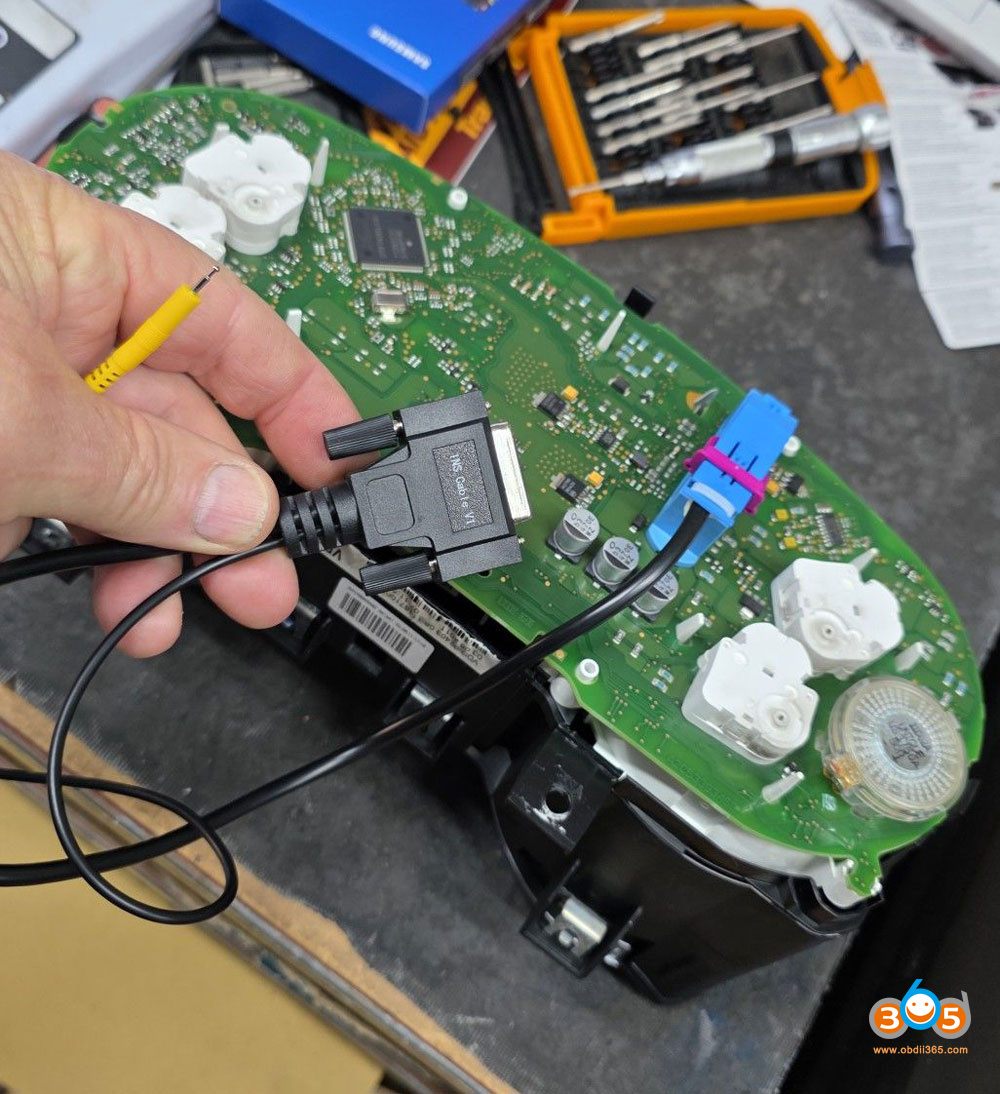
It worked it out finally. This pogo cable does indeed connect to the xprog 3 yellow port. But doing so when connected to the car with old port powers up the instruments. So you need to find the pogo point, then touch and hold pogo on point while connecting to xprog3 the instrument should now enter service mode.

Hold the probe on the boot point, power on the cluster, you can then retrieve the immo data. After retrieval of immo data, put cluster back in car and turn ignition on before doing dealer key and learn key. Done successfully.

How to Use Launch X431 with Pogo Cable 4

FYI:

Be careful when using pogo pin method. If you use the wrong pin it can cause corruption on clock.

Comments

Popular posts from this blog

Install Launch X431 SmartLink C J2534 Driver

Launch X431 SmartLink C can be used as a J2534 PassThru device, working together with the PC installed with the OEM diagnostic software to perform the J2534 reprogramming.   Obdii365   shows where to download and how to install the Passthru SAE J2534 driver for LAUNCH X431 Smart Link C passthru adapter (for   PAD VII ) If you have Smartbox 3.0 (old PAD V and   X431 Pro5 ), download J2534 passthru   in the previous post .     How to Download Launch X431 SmartLink C J2534 passthru driver?   Same as smartbox 3.0, you need both installation programs (setup driver and PC tool for update).   1. Download PC tool for update (update smartlink c firmware) Visit   https://en.cnlaunch.com/ Select Products tab->X-431 PAD VII Pull down product information and find   Download Download   Smartlink J2534.zip Install Launch J2534 PC tool Run LAUNCH J2534 program on desktop. Now you can check Smartlink adapter version and update firmware 2. Do...

Will Lauch X-PROG3 Work with Diagzone, Xdiag or Prodiag?

Does Launch X431 X-prog3 work with xdiag, diagzone or prodiag activations?  Diagzone compatible xprog3? Is it working with prodiag? Will it work with xdiag? These are frequently asked questions of   Launch X-PROG3   (also called GIII) programmers. X-prog3 is compatible with Multiple X-431 Series   X-431 V ,  X-431 V+ ,   X431 Pro5 ,  X431 ProS ,   X431 Pro3s+ ,  X-431 PAD V ,  X-431 PAD VII , X-DIAG Pro3 diagnostic tablets. This programmer works not only for programming keys, but for working with ECU and gearbox. But when comes to key programming you need to know what you doing there is not too much info in the Diagzone/Prodiag software.   What worked and failed? Here are user reviews. *You are at your risk. We don’t provide technical support to 3rd party software.   Prodiag: Yes It works with prodiag. Prodiag provides usb connection with virtual comport. It works fine to read ECU and gearbox clone. For example, VAG DQ200 gearb...

How to Make Porsche Coding Changes with Launch CRP919X CRP919E

 Instructions on Make Porsche Coding Changes using a Launch CRP919X , CRP919E , CRP919X BT , CRP919E BT scanners. Plugin X431 into OBD 2 Port, Turn Key to Accessory Mode and Wait until VIN is Determined then Hit the Back Arrow in the Upper Left Until You Get to the Next Screen Shown Below  Then select Diagnose (Although you may want to update the unit if updates are available) Then Scroll Down and select Porsche Then Select OK Then Select Automatically Search The Unit should determine the type of 718 you have and then Select OK Then Select System Selection Then Select the appropriate System for the Code you want to adjust (Note: This is the system listed in the instructions below such as Front-end Electronics, Rear-End Electronics, Instrument Cluster or Air Conditioning) Then select Code/Brush Hiding Then select Brush Hidden/Modified Then find the Code you want to adjust (These are the Codes in the instructions below) Then Make the Change Then Hit the Write Code Button