
Launch X431 IMMO Plus Clone Benz SIM271DE 2. ECU

Many tools can clone Mercedes Benz SIM271DE 2.0 ECU on bench. Here we will show how to clone Benz SIM271DE 2.0 with Launch X431 IMMO Plus along with the X-prog3 programmer.

Launch X431 IMMO Plus Clone Benz SIM271DE 2. ECU 1

 Launch X431 IMMO Plus Clone Benz SIM271DE 2. ECU 2

The ECM was replaced because it had burnt drivers for the coils. Something that is very common on these this particular computer style.

Launch X431 IMMO Plus Clone Benz SIM271DE 2. ECU 3

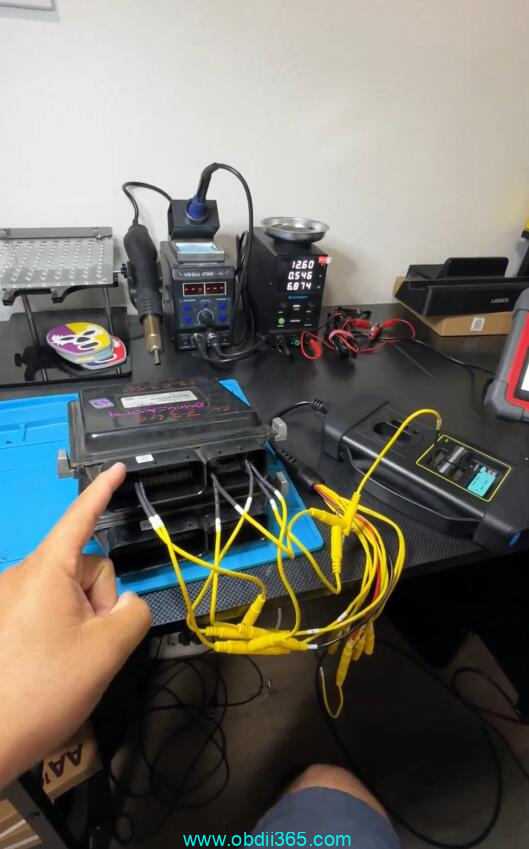
This is the original Continental SIM271DE 2.0 and the left is our used replacement that got from a junkyard.

We are going to use the Launch X431 IMMO Plus along with the X-prog3. This unit comes with the IMMO Plus whenever you buy the full package.
We are going to start by selecting IMMO Prog. It gives us a little diagram of how to connect the x-prog3. Once we get into the menu, we’re going to select engine, scroll down and find SIM271DE.

Launch X431 IMMO Plus Clone Benz SIM271DE 2. ECU 4

Launch X431 IMMO Plus Clone Benz SIM271DE 2. ECU 5

Launch X431 IMMO Plus Clone Benz SIM271DE 2. ECU 6

Launch X431 IMMO Plus Clone Benz SIM271DE 2. ECU 7

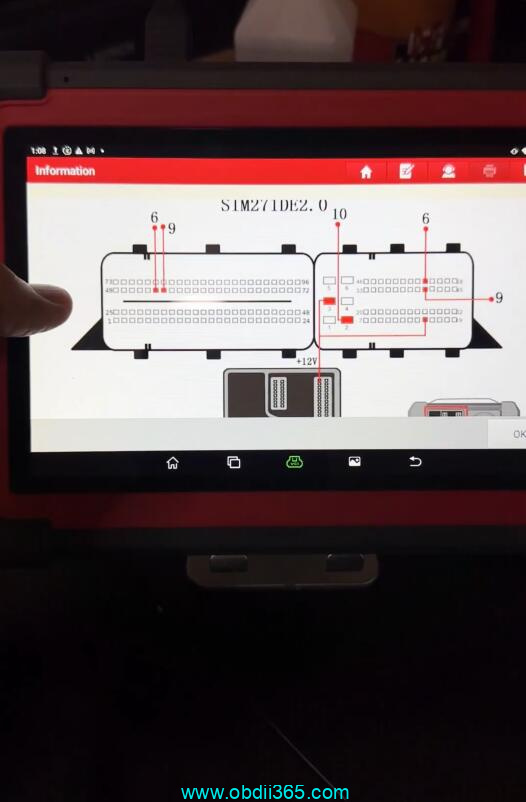
Click on view wiring diagram.

Launch X431 IMMO Plus Clone Benz SIM271DE 2. ECU 8
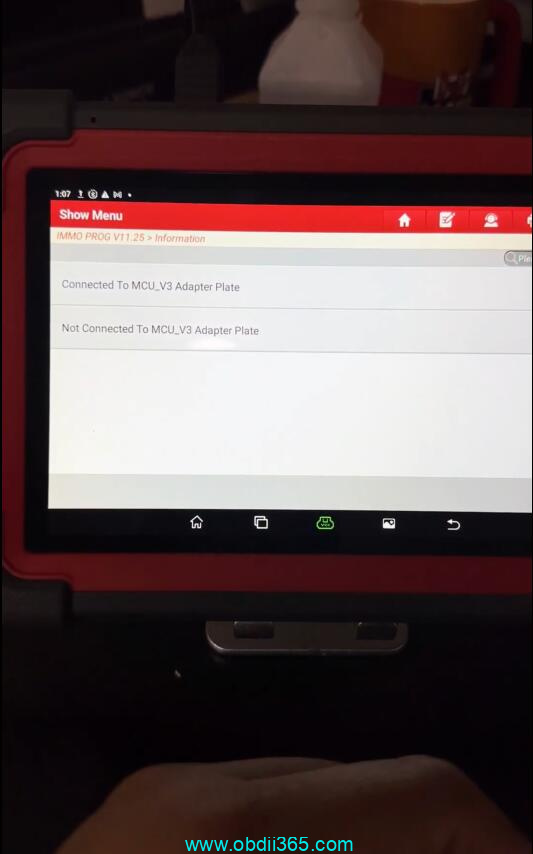
Now we have two different options of how we can do this with or without the MCU3 adapter.
In this case, we don’t need the MCU3 adapter.

Launch X431 IMMO Plus Clone Benz SIM271DE 2. ECU 9

Here’s the wiring diagram. It shows us exactly where we need to connect to on the computer pins.

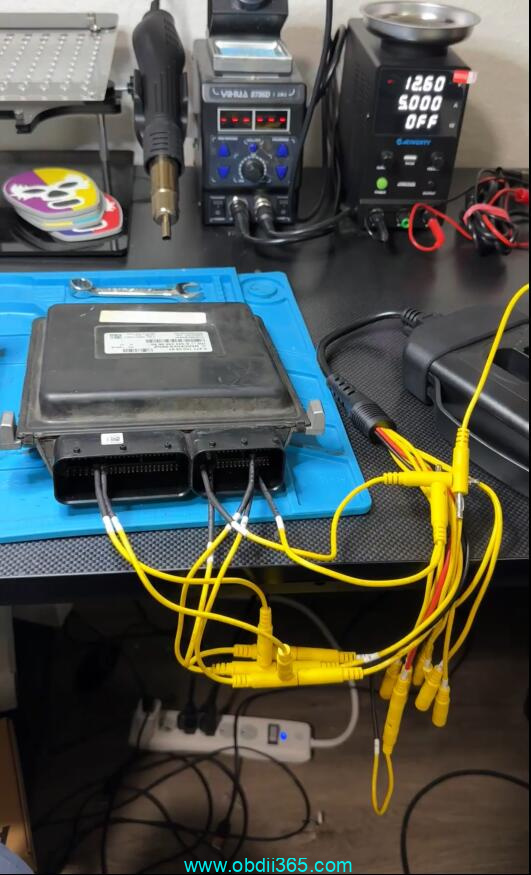
We are going to connect the leads from the xprog to our original computer.  We’ve got our leads connected to the ECM according to the diagram.

Now launch makes this really easy they include a lot of different size and types of leads.

Launch X431 IMMO Plus Clone Benz SIM271DE 2. ECU 10

Launch X431 IMMO Plus Clone Benz SIM271DE 2. ECU 11

Launch X431 IMMO Plus Clone Benz SIM271DE 2. ECU 12

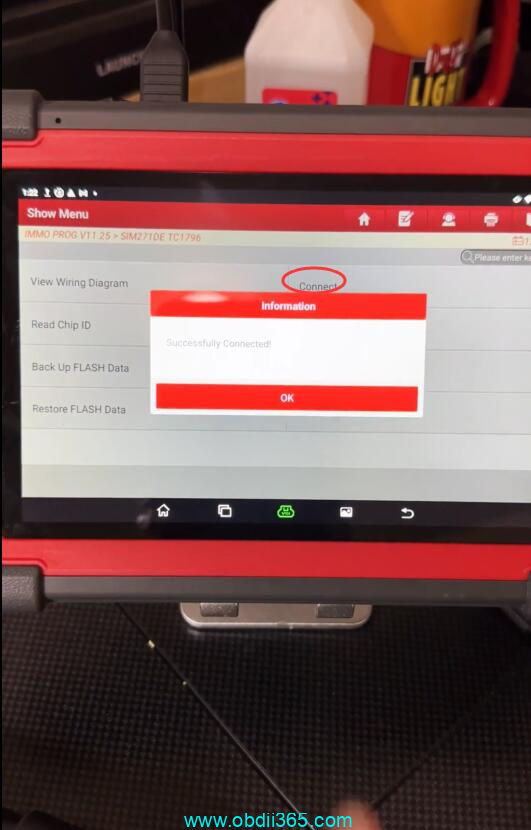
So moving back over to the main menu we’re going to start by hitting connect. Secure login and process.

Make sure you’re connected to the internet for this.  We’ve successfully connected.

Launch X431 IMMO Plus Clone Benz SIM271DE 2. ECU 13

Now let’s start by backing up the eeprom data. It’s reading the eeprom. We’ll let this finish it’s done. We’ll name our file and save it.

We’ve successfully backed up the eeprom.

Launch X431 IMMO Plus Clone Benz SIM271DE 2. ECU 14Launch X431 IMMO Plus Clone Benz SIM271DE 2. ECU 15

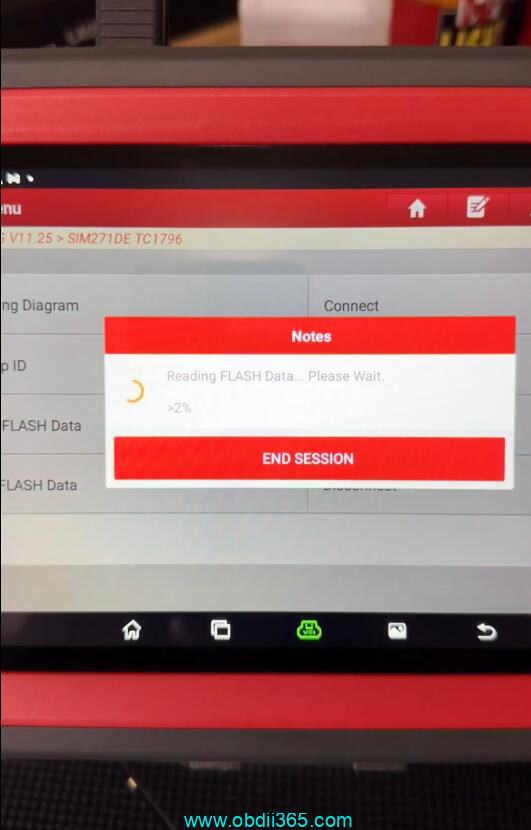
We can continue by backing up the flash data.  It’s reading the flash data. We’ve successfully read Flash data. We’ll name our file and save it. Backup succeeded .

Launch X431 IMMO Plus Clone Benz SIM271DE 2. ECU 16

Launch X431 IMMO Plus Clone Benz SIM271DE 2. ECU 17

Launch X431 IMMO Plus Clone Benz SIM271DE 2. ECU 18

We’re going to go ahead and hit disconnect.

Move these leads over to our used replacement unit.  We’ve got our leads connected to our used replacement ECM.

Launch X431 IMMO Plus Clone Benz SIM271DE 2. ECU 19

Go ahead and click connect. It’s logging in. We’ve successfully connected.

Always back up the eeprom and flash data from the donor module just in case anything goes wrong. You can always revert back.

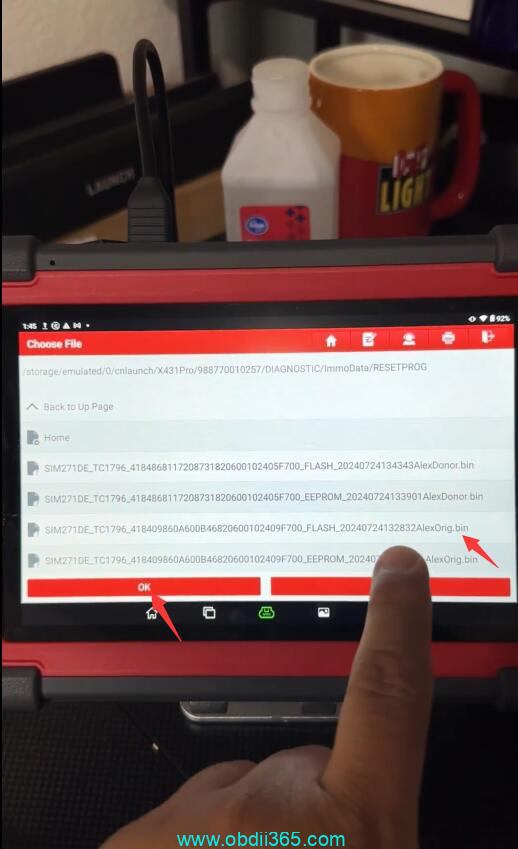
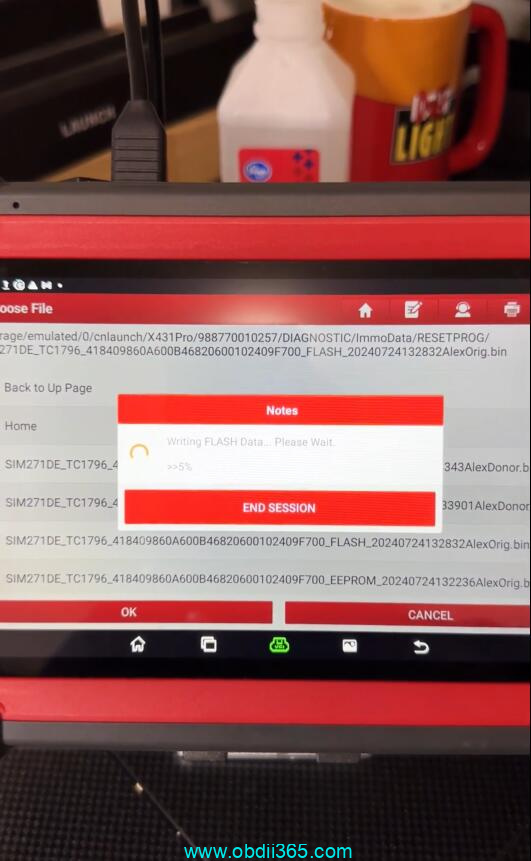
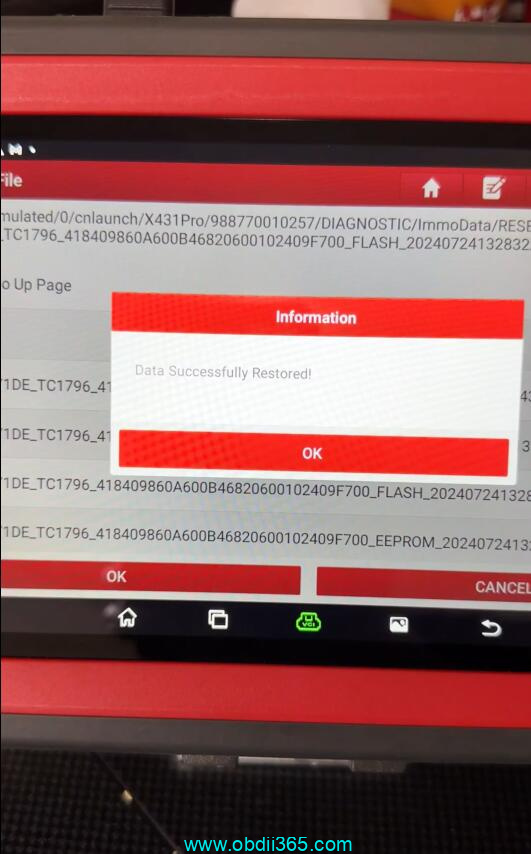
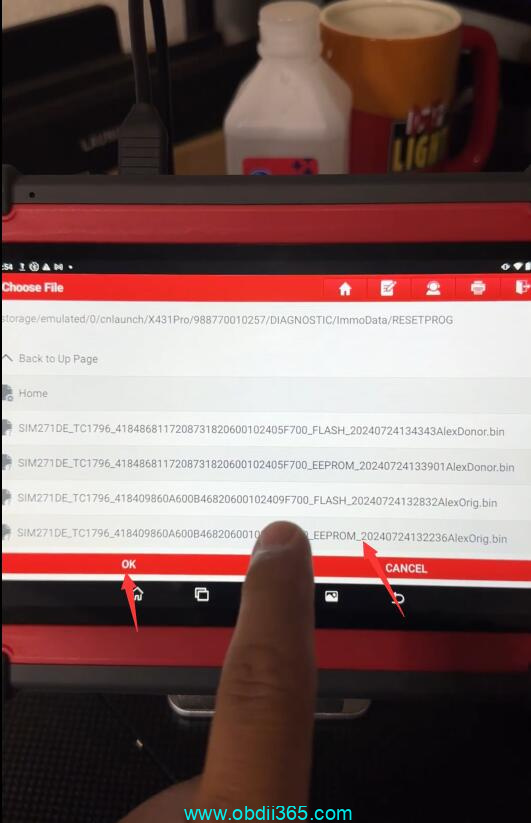
We’re going to start by restoring the Flash data and we’re going to select our file from the original. It is now writing the flash data from our original module over to our used replacement module. Data has been successfully restored.

Launch X431 IMMO Plus Clone Benz SIM271DE 2. ECU 20

Launch X431 IMMO Plus Clone Benz SIM271DE 2. ECU 21

Launch X431 IMMO Plus Clone Benz SIM271DE 2. ECU 22

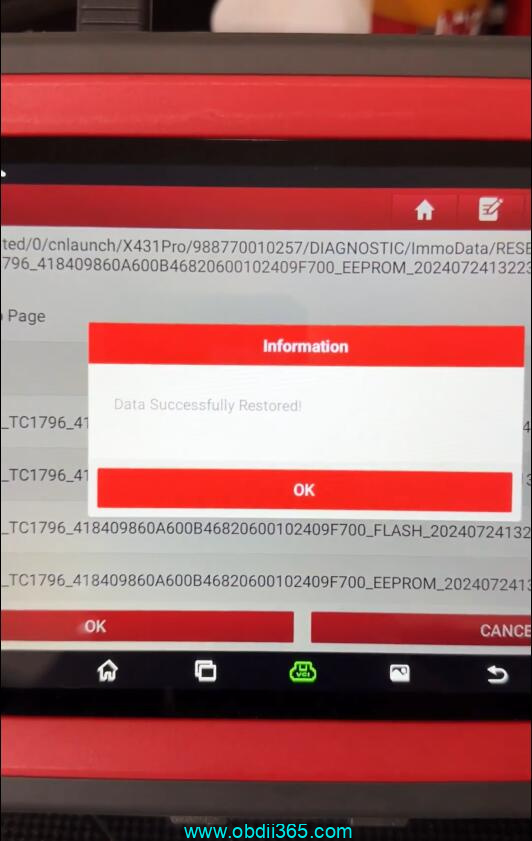
Then we’re going to restore the eeprom data. Select the original file. Now it’s writing the eeprom data from the original computer over to our used replacement module and data successfully restored.

Launch X431 IMMO Plus Clone Benz SIM271DE 2. ECU 23

Launch X431 IMMO Plus Clone Benz SIM271DE 2. ECU 24

We can disconnect and remove our leads. This computer has now been successfully cloned and is ready to install into the vehicle.

That’s how you successfully clone a module using the launch x431 immo plus along with the launch xprog 3. If you’re looking to get into cloning modules and even key programming we would highly recommend investing in one of these.

www.obdii365.com

Comments

Popular posts from this blog

Install Launch X431 SmartLink C J2534 Driver

Launch X431 SmartLink C can be used as a J2534 PassThru device, working together with the PC installed with the OEM diagnostic software to perform the J2534 reprogramming.   Obdii365   shows where to download and how to install the Passthru SAE J2534 driver for LAUNCH X431 Smart Link C passthru adapter (for   PAD VII ) If you have Smartbox 3.0 (old PAD V and   X431 Pro5 ), download J2534 passthru   in the previous post .     How to Download Launch X431 SmartLink C J2534 passthru driver?   Same as smartbox 3.0, you need both installation programs (setup driver and PC tool for update).   1. Download PC tool for update (update smartlink c firmware) Visit   https://en.cnlaunch.com/ Select Products tab->X-431 PAD VII Pull down product information and find   Download Download   Smartlink J2534.zip Install Launch J2534 PC tool Run LAUNCH J2534 program on desktop. Now you can check Smartlink adapter version and update firmware 2. Do...

Will Lauch X-PROG3 Work with Diagzone, Xdiag or Prodiag?

Does Launch X431 X-prog3 work with xdiag, diagzone or prodiag activations?  Diagzone compatible xprog3? Is it working with prodiag? Will it work with xdiag? These are frequently asked questions of   Launch X-PROG3   (also called GIII) programmers. X-prog3 is compatible with Multiple X-431 Series   X-431 V ,  X-431 V+ ,   X431 Pro5 ,  X431 ProS ,   X431 Pro3s+ ,  X-431 PAD V ,  X-431 PAD VII , X-DIAG Pro3 diagnostic tablets. This programmer works not only for programming keys, but for working with ECU and gearbox. But when comes to key programming you need to know what you doing there is not too much info in the Diagzone/Prodiag software.   What worked and failed? Here are user reviews. *You are at your risk. We don’t provide technical support to 3rd party software.   Prodiag: Yes It works with prodiag. Prodiag provides usb connection with virtual comport. It works fine to read ECU and gearbox clone. For example, VAG DQ200 gearb...

How to Make Porsche Coding Changes with Launch CRP919X CRP919E

 Instructions on Make Porsche Coding Changes using a Launch CRP919X , CRP919E , CRP919X BT , CRP919E BT scanners. Plugin X431 into OBD 2 Port, Turn Key to Accessory Mode and Wait until VIN is Determined then Hit the Back Arrow in the Upper Left Until You Get to the Next Screen Shown Below  Then select Diagnose (Although you may want to update the unit if updates are available) Then Scroll Down and select Porsche Then Select OK Then Select Automatically Search The Unit should determine the type of 718 you have and then Select OK Then Select System Selection Then Select the appropriate System for the Code you want to adjust (Note: This is the system listed in the instructions below such as Front-end Electronics, Rear-End Electronics, Instrument Cluster or Air Conditioning) Then select Code/Brush Hiding Then select Brush Hidden/Modified Then find the Code you want to adjust (These are the Codes in the instructions below) Then Make the Change Then Hit the Write Code Button